Late last winter, and I had just gotten a bonus from work. I was going to use it to pay for a restored stove, but then had to use most of that money to pay for taxes. Boo. But every time I looked at information on the stoves, I kept thinking, that looks so uncomplicated - I could totally do it. And what I couldn't do, my hotrodding husband could help me do. A stove is WAY less complicated than a car.
So we purchased this one off Craigslist:

but it wasn't quite the one I wanted - I had to have a Chrome top (this one was a black porcelain)

and I wasn't thrilled with the low back.


And the griddle was a piece of work (apparently according to the previous owner, the woman he got it from was a bit of a drunk, and would forget when her stove was on)


But the stove itself was in pretty good condition.
So I stewed about it a bit and kept checking Craigslist & eBay.
Then Jim found another one on Craigslist. It was super cheap ($50), but didn't include a picture. We found out it was a "Silverlight B" with a high back and went over to swipe it up that day.
This is what a restored Silverlight B looks like:

Source: chambers.mgbotanicals.com
Ironically, as a side note, we had spent the day watching the marathon as it runs a block away from our house, and it was while we were driving to pick up the stove that we found out about the marathon bombings. That is why I distinctly remember this stove was purchased in April.
For some reason, I failed to take any pictures of this purchase until I started taking it apart. Could have been the marathon bombing craziness.
But this stove had everything I wanted in a Silverlight B -
-Chrome top
-high back
-Chrome top
-thermowell
-Chrome top
Did I mention Chrome Top?
The stove even had the highly sought after red cloisonne knobs (just like the ones in the picture above), which in and of themselves were worth the $50. This stove was a little more rusty and beat up, but we should be able to combine the two to make one good one.
Most of the pictures I have of the stove are ones that I took while taking it apart so that I would remember how to put it together again. And those are thrilling.


At this point, all of one stove and most of the other stove has been taken apart. I've cleaned up most of the 60 years of grease, the chrome parts have been replated (oh, it is pretty), the burners and gas valves have been all shined up, and I'm in process of repainting the body and reassembling the burner knob mechanism with all new stainless steel springs and screws.
I've been working on this at a snails pace. I am definitely as slow as molasses. I actually planned to work on it over Christmas break, but it's been below 10 degrees and the garage isn't heated, so forget it.
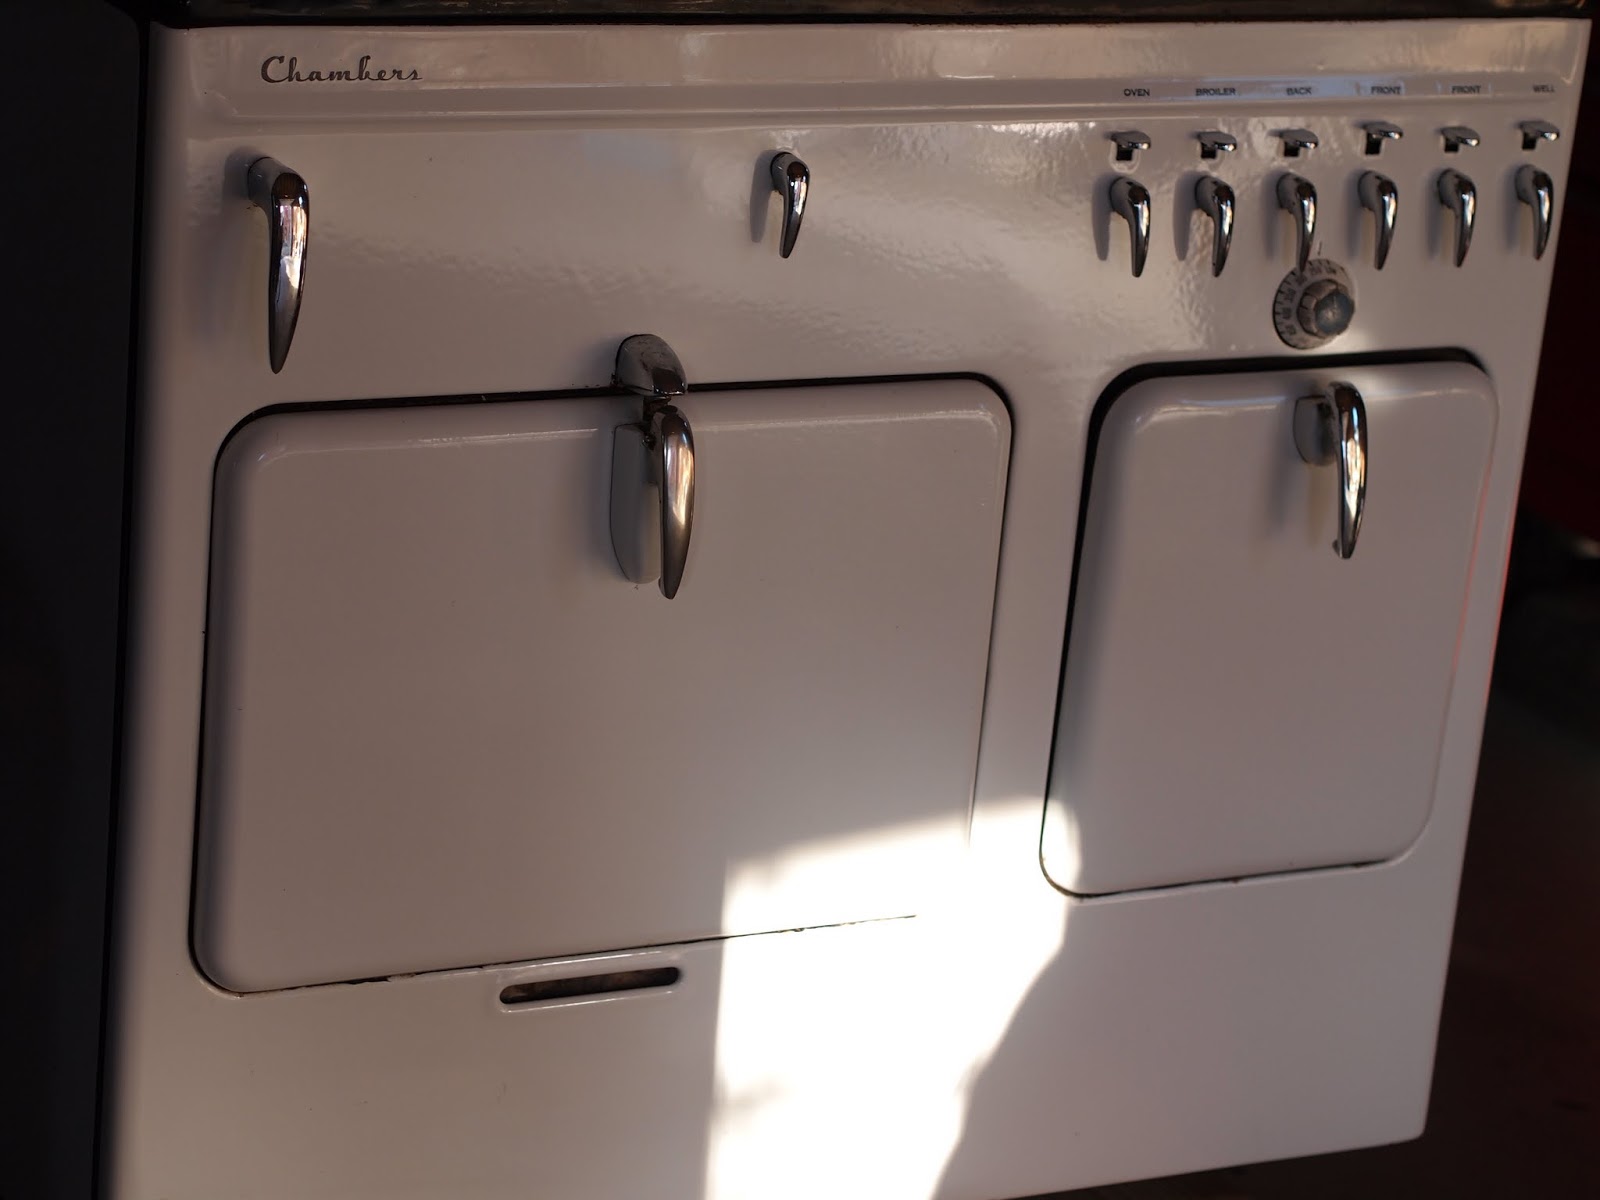
Here's the pretty chrome top:

And here's the valve to the thermowell cooker - all shiny with the thermowell body and the bracket all cleaned up and painted.

And here's the painted bottom of the stove. I'm planning to replace those carriage-type screws with some chrome metal feet. Unless it looks ridiculous, and then I'll just put new carriage screws on it.

Here's the knob mechanism cleaned up, painted, and with the replacement springs

And here's a photo collage of some of the chromed and painted parts. It's looking pretty good.

Some people think I'm absolutely out of my mind. But I love it. And this is about what I imagine the end product looking like in my new kitchen:

Source: Country Living
But I have a lot of work to go - finish painting the body, reassemble all the mechanisms and gas lines, re-insulate the oven door, shine up the replacement griddle and broiler pan, clean up all the porcelain and send out some of the parts to get a new coat of porcelain. Probably some other things. Man, am I slow at it, but it's moving forward and will definitely be pretty in the new yet-to-be-started kitchen.