Monday, July 28, 2008

Porch Progress

Friday afternoon, the shipping company called to schedule the delivery of the porch floor - it's for Monday afternoon (today). So that was the incentive for this weekend's flurry of activity.

Jim left to work on his '36 at the shop, and I started ripping out the hand rails and the floor. Don't worry - I have saved the original turned balusters. I might use a few of them as legs on a cabinet for the sewing room - a project I've been thinking about since I made the vanity for the 1/2 bath:


But I do have all of the balusters in a box in the garage for now. If some soul reading these words wants them, let me know. Otherwise, I'll probably lug them to a salvage yard at some point in exchange for some other goodies.

As I ripped out a few of the handrails, I realized how loose the porch posts were, and made a call to Jim, saying we probably ought to put up some stabilizers. I think he had planned to spend most of the day doing car things, but ended up coming home and helping me out. Anyway, here's the demo that I started, although I had also removed the exposed deck boards at the point where Jim came home:


I especially like how they put that special piece of paper in between the two floors. Not sure what the function of that was - maybe to hold more water to speed up rot. Strangely, it appears that the under layment of 1x6 deck boards was the original floor - the house finishing was built up around it - siding and such. Either that, or they replaced the original floor and shoved the new floor into the crevices. Not likely, at least not for the previous owners, as they seemed to have only done one repair/remodel of everything around the 50s, and that was probably the tongue & groove floor on top. Why take out a rotting floor, when you can just cover it up?

So while I was having fun demo-ing the porch by myself, I was much slower than the two of us together, and soon the porch looked like this:


You may notice in the second picture how one of the despised rhododendrons is now just a bunch of stumps! yes, that's right... I love my chain saw and hate ugly overgrown and diseased flowers... I just left enough stumps to pull the remaining plant out. And you can't see it, but the hideous overgrown hosta has also been removed. I had considered replanting it in a shady section of the yard, but decided it was too ugly and uninteresting. The plant clearing, by the way, though it may seem like a completely random activity, proved to be worthwhile for this project, as it opened up the way for the wheelbarrow...

At this point, Jim and I really didn't know where to go next and how much of the framing really needed to be replaced. Jim, I think, secretly wants to live in a brand new house that just looks like an older house, because he starts talking about how he thinks you have to start with good stuff (interpretation: new boards) underneath or it will be a waste of time. But he admitted that he does not know construction well enough to make a good call.

Luckily, our neighbor John, who is also a general contractor, pulled into his driveway about this same time. He checked it out, gave us some advice, let us borrow some tools, and we were back working.

To replace these lolly columns (which were rusting out and only 6 inches deep)...


...we (meaning Jim) dug some holes about 4 feet deep under each of the post locations:


That did it for Saturday...

When I got home from church on Sunday, Jim had already started with John's borrowed cement mixer. We placed the 8-inch diameter forms into the holes and then filled them with cement, adding a bolt at the top to attach a new post.


One of my jobs was to find the position of the bolt, right underneath the corners of the porch. Since we didn't have an actual plumb-bob, I substituted a nail tied to some sewing thread. Maybe not perfect, but good enough.

We didn't get the cement forms very well centered under the posts, but John said that didn't really matter - the posts just needed to push down on the cement. Jim decided to leave a mark:


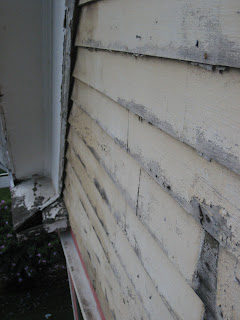
My other job was to scrape the remaining original paint - on the bottom most clapboard and then also on one of the turned posts. Somehow I have been able to do about 1/2 of the entire house without problems with the Paint Saver Pro, but on this one tiny project, I managed to cut the electrical cord with the rotating blades :(

I also have to document this:


And the good news is that we cleaned up early so that we could head over to Angell Animal Hospital. They gave us the OK to pick up Taya a day early! She has stitches in her belly, some shaved spots where they put the doggie IV, and a shaved spot with a doggie transdermal patch. But she's eating food and home again.

Friday, July 25, 2008

It Pours

Jim did a temporary fix on the roof yesterday. Luckily, it doesn't look as ghetto as a big blue tarp:


It's holding the rain pretty well.

He used some wide flashing and slipped it up under the shingles. He said that 2 complete shingles were missing and that the old sheathing underneath had rotted away and that a squirrel had finished the job by chewing more of it away and built a nest.

Today and tomorrow should be rain free, so hopefully it will dry out and we can do a more permanent patch - I just want something that will hold at least a couple of years - until we have the cash flow to do the whole roof.

In other news, we found out that Taya has a mass on the wall of her intestine. This explains why she doesn't want to eat anything - not much is passing through.

After some discussion, Jim and I decided to go ahead with a surgery. They'll cut out the section of the intestine that is affected and sew it back together. They also will have to check for any other problems - other cancer growths or lymph node issues. As with all surgery, there are risks, but they said this is a very common surgery (for various reasons) at Angell, so I feel a little better.

She has been with me for 12 1/2 years - through thick and thin - and I just can't bear to not do what I can to help her. Say a little prayer for her.


Wednesday, July 23, 2008

When it rains...

...old houses leak, aparently. I have nightmares about finishing the ceiling in the guest room just before my parents came to visit several years ago for the first time, and then having the whole thing ruined by a rainstorm, just a few days prior to their visit. We found out then that it was a ridge vent that had blown off the peak sometime prior. No idea how long that was going on.

Well, today appeared to be another nightmare. Jim called me upstairs to show me dripping water all over the ceiling in the hallway of the 2nd floor. Not sure if this picture does it justice:


We started our mini-investigation to find the source and any further damage...

Here's the crawlspace in the attic - way in the back you might be able to see that the boards/wall are also wet.


and here is inside the knee-wall closet in the attic. LUCKILY, this is the same closet that I have been keeping my vintage sewing pattern collection. Nice combination: water and 50+ year old tissue paper patterns... I don't think any of them were damaged yet


And here is looking outside of the window in the attic - notice how all of the clapboards are wet. We weren't sure if it was that rotted out cornice trim missing a cover - maybe rain water was getting into that and soaking up the walls?


Then Jim looked outside at the roof. He thinks he found the source. Again, I'm not sure you can really tell from this picture, but it appears to be a small dip in the roof...


I think he's going to look at it closer tomorrow. After he takes the dog to the internal medicine specialty service because she's not eating again. I need one of those money trees. Does anyone know where they grow?

Country Crown Pics

Got the camera back... here's the pictures of the completed "country crown" moulding. I think it turned out purdy good, as they say in the country:


The only part left now is a little spackle on the drywall they cut for the electricity lines... it may be another 3 years before that gets fixed (or we have another houseguest, whichever comes first)

Monday, July 14, 2008

A proud owner of a router!

Jim & I finished the crown moulding in the bathroom, caulked it, and painted it, and now it doesn't look bad - pretty good, I'd even say. But Jim grabbed the camera on his way out the door for his latest work trip, so I unfortunately have no pictures of that for you today.

I am also proud to announce that I have finally made a router purchase! I was contemplating buying a whole setup - with a table and everything. Jim reminded me that we are fast running out of "shop" room in the basement, and I should look into using the table saw.

This is the saw that I have:

It's nothing particularly special or fantastic, but it's pretty good as a beginner/hobby saw - which is what I need. It's a Ryobi BT3100. I got it at Homer a few years ago, but for some reason they no longer sell it.

If you look at the accessory table on the right, you can see a fairly large hole - this is where you can attach a router. I don't have any experience with routers, and I couldn't visualize how you attach a router to that table - especially when the router that we had was an old old one from Jim's grandfather. I did a little bit of searching, and found that you can purchase this accessory kit to mount a router:

It seems like the only key piece in that kit for attaching a router is that aluminum dog-eared plate. The kit is listed at $99 at Homer, and less at ebay auctions, but still seems like a lot when all I need is what looks like a simple plate.

More searching, and I found this site dedicated to the Ryobi BT3100. It's kinda funny to have an entire forum dedicated to a Ryobi table saw... But it was helpful. I got the reassurance that you can just fabricate your own aluminum plate - that the bottom of the accessory table has the shape you need molded into the metal. Then you can drill your own holes for whatever router you have or choose.

So with that knowledge in hand, I headed over to Rockler after work and picked up this little router:

It's a Porter Cable 892. Maybe it's more than I need, but after some research, it looked like I'd be wasting my time with less than 2hp, and this particular model has a way to crank the router up from above the table to more easily change bits.

Now, to begin my routing, Jim is going to fabricate that aluminum plate, and I have to wait for my special 120 degree v-groove bit to come in to do this job on the balusters. I have a feeling that everything - bit and flooring will come in all at once - probably on a weekend that I have no time. Or it's raining.

Monday, July 7, 2008

Odds & Ends and some Country Crown

I finally purchased the flooring for the porch, but it won't come in for probably another 2 weeks, so I tried to finish up some odds & ends this long weekend.

First, I finally finished cutting all the sawn balusters! This is a big accomplishment - and I'm totally excited to have it done. Next I need to route a v-groove in the bottom and paint the suckers. As of yet, I don't have a router or a router table or a v-groove bit, so this may require a trip to Rockler to actually make the purchases (this is why fixer uppers are called money pits)

Second, I finished cutting the two bundles of cedar shingles into the octagon shape. Out of those two bundles I got about 175 cut shingles.

Third, I took some measurements and created a spreadsheet (yes, I AM my father's daughter) to determine how many more shingles I would need to cover the side and front peaks (see this old post for an explaination) and the color breakdown. This included deciding on a pattern for the colored band. Unfortunately for me, I still have about 4 more bundles to cut. Then I need to lightly sand them all and paint them. All you suckers out there that have agreed to help me paint - this is your opportunity!
Then Jim helped out with a couple of little projects:

Fourth, we installed some shop lights in the basement. While the basement is still really creepy, the lights really improve the working conditions. And they're less of a head hazard then the existing dropped lights.


Fifth, Jim installed the exterior faucet for the front of the house.

This project was kind of cool because we used PEX tubing (traditionally used copper is ridiculously priced right now) and quick release connectors. Pretty nifty - wish we would have had these in the 1/2 bath project - could have avoided lighting things on fire! We are a little suspicious that they will all hold together, but so far, so good.


And finally...
Because I have visitors coming in a couple of weeks, I decided to try and finish off the crown moulding in the bathroom. The crack between the ceiling and the walls has been there for... hmmm... at least 3 years:


I've just been avoiding it. But this weekend, I decided to give it a whirl. It's not a typical crown moulding - it's pieced from a cove stock and 1x2s. Something like it was originally there and got tossed somewhere along the way - during our demolition, I think. And I found an example of it in a finish carpentry book - they called it "Country Crown Moulding". Unfortunately, though, nothing in that bathroom is square, and my skills with the miter saw still leave something to be desired... so there are a lot of gaps. Luckily, caulk is my friend, and it will all be painted.


Anything has got to look better than the gaping holes that have been there.... right??

Friday, July 4, 2008

More Porch Lights

So I'm a little obsessive... ok, I'm a LOT obsessive. I found some more light options for the porch:


Those first two might be a tad bit too large for our porch. They're running right at 20, 21 inches.

Also, I think I might be a little obsessed with maritime influenced lights, as this one is SOOOOO cool... but sooooo too expensive, running at over $1700:


Then in my searching on lighting websites, I found a few cool ceiling fans - Jim keeps talking about getting ones for the living room and the bedroom. I have fears of them being polished brass with tulip bell lampshades and fake wood blades, but if they are as cool as these, I'm willing to put one up...


+ this light kit:

Thursday, July 3, 2008

Porch Light

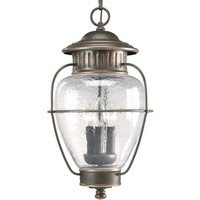
I did some Googl-ing today to look for a porch light. There are a lot of hideous porch lights out there. I'm limiting myself to ceiling fixtures, as that is where it is already wired. And because the ceiling is on the lower side, they also have to be small enough that you don't hit your head on it.

These are what I came up with...


And I think these last two are my favorites: